
Not having adequate storage space on your iPad can result in the inability to install new apps, update software and backup the device. You may also notice that installed apps aren't functioning properly. There are several ways to free up storage space on an iPad, which you will find within this article.
Check Storage Space
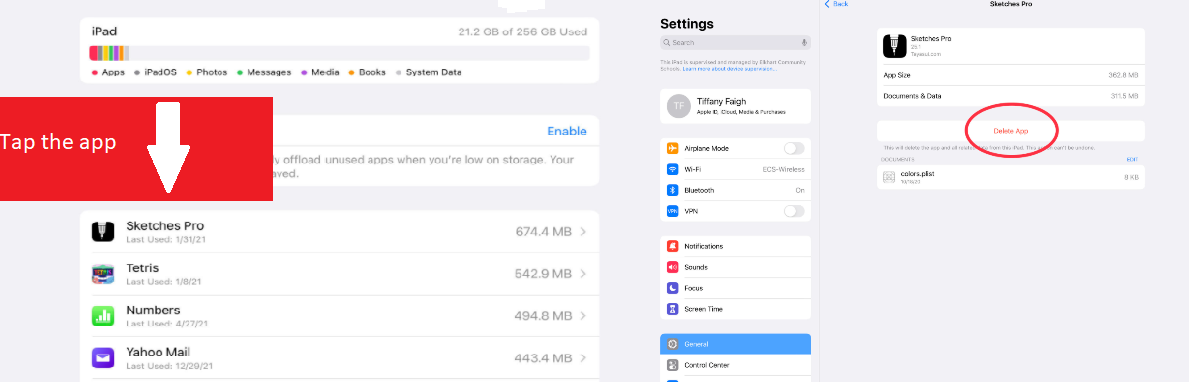
In order to determine the best route, start by checking the current status of your storage space. Go to Settings > General > iPad Storage. At the top of the iPad Storage page you’ll first see how much free space is remaining, along with recommendations (if any) for clearing up space, plus a list of all your apps sorted by size. The MB/GB size next to each app represents the actual application size plus its downloaded content (e.g. charts, movies, music, etc.).

How to free up space
1. Delete unused apps – The easiest way to free up space is to review the app list provided when you checked the storage space (settings -> general -> iPad storage) and see if there are any apps that you don’t use anymore. You’ll probably be surprised to see how much space some apps are taking up, especially if they contain embedded video or media.
To delete an app from this list, tap the name and you’ll see a red Delete button appear. After confirming the deletion, the app is removed and that space is instantly freed up.
You can also delete apps directly from the home screen of the iPad. To do this, tap and hold the application icon until it wiggles. Tap 'Remove App' then tap 'Delete App' OR tap 'Edit Home Screen' then tap 'the small “-” in the upper left corner, then tap 'Delete App'.

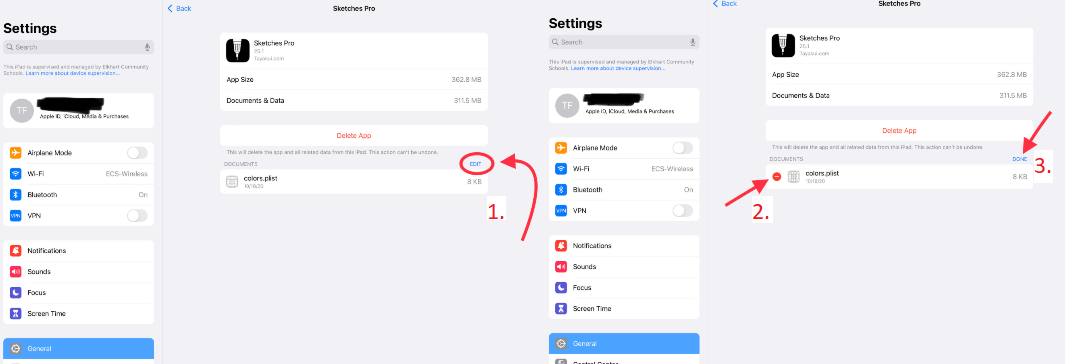
2. Remove media collections inside of apps – There may be apps on the list here that display a massive file size, but in reality are bloated due to the media downloaded in the app. When you click on one of the apps you’ll see Documents and Data listed with a file size. It doesn’t take long for your favorite magazine or newspaper app to grow to several GB of data after a years worth of downloads. Most apps allow you to delete individual editions or old content right in the app to free up space.
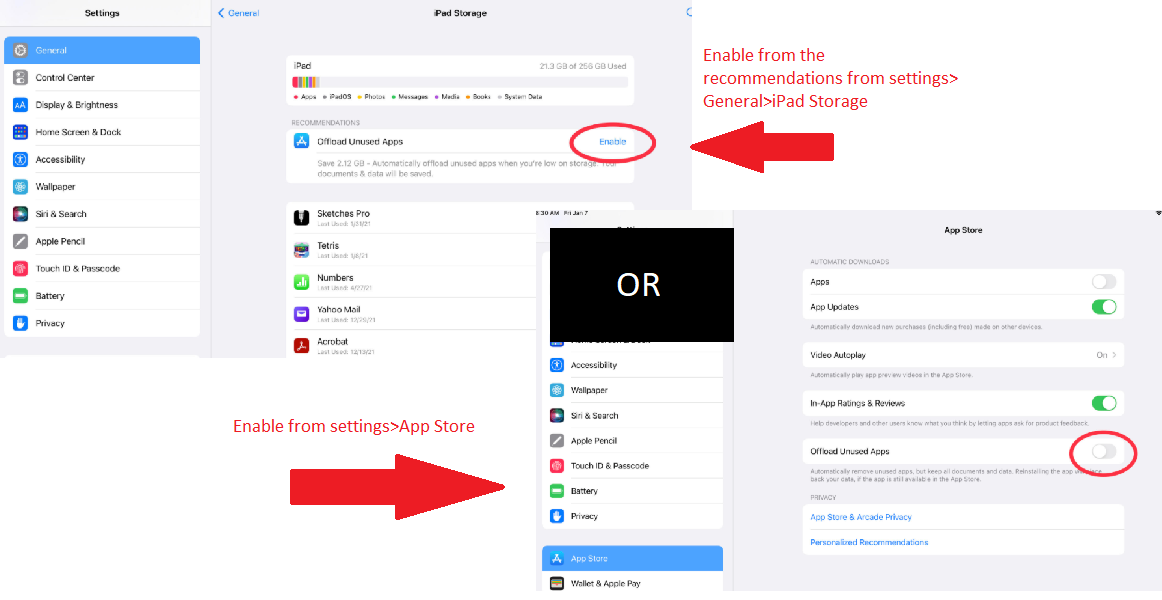
3. Use the Offload App option – If you’re not ready to completely delete an app, you can also tap Offload App. This is sort of an in-between state, where the app’s settings and documents are retained, but the app itself is deleted. If you need to use the app, it can be quickly redownloaded. This is useful if you need a quick, one-time free-up of space (maybe to do a big iOS update).
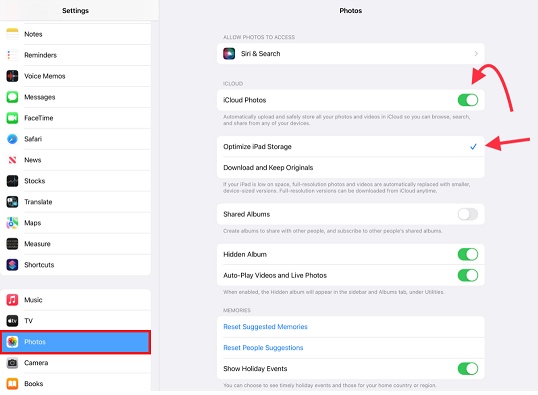
4. Use cloud services for videos and photos – Consider moving your large photo collections online to cloud servers, using services like Apple iCloud, Dropbox or Google Drive. For example in the main iPad Settings > Photos section you can enable iCloud Photos, which will automatically upload and store your entire photo library for instant online retrieval. You can also choose Optimize iPad Storage, which means the iPad will only store a lower resolution copy of your photos on the iPad itself.
5. Delete photos and videos- A common solution to clearing storage space on an iPad is to delete photos/videos from your photo library. Prior to deleting, be sure you have iCloud photos enabled and, if able, conduct a backup. Once selected content is deleted, be sure to go to the 'recently deleted' folder to delete the content permanently.
- Open Photos on the iPad.
- Tap Select in the upper right corner.
- Tap on the photos you would like to delete.
- Tap on the trashcan icon.
- When you're sure, tap Delete Photos.
- Go to Photos > Recently Deleted.
- Tap 'Select' > 'Delete All'.
- Delete them from there to truly free up your device's storage.
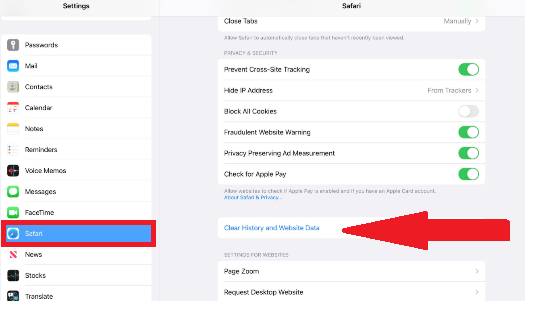
6. Clear web browser cache- Web browsers save data from frequently-visited sites to improve the user experience. It’s worth clearing this out from time to time to free up space and speed things up. Go to Settings > Safari > Clear History and Website Data > Clear. This will remove browsing history, cookies and other cached (saved) data. This solution is primarily for teachers and staff.
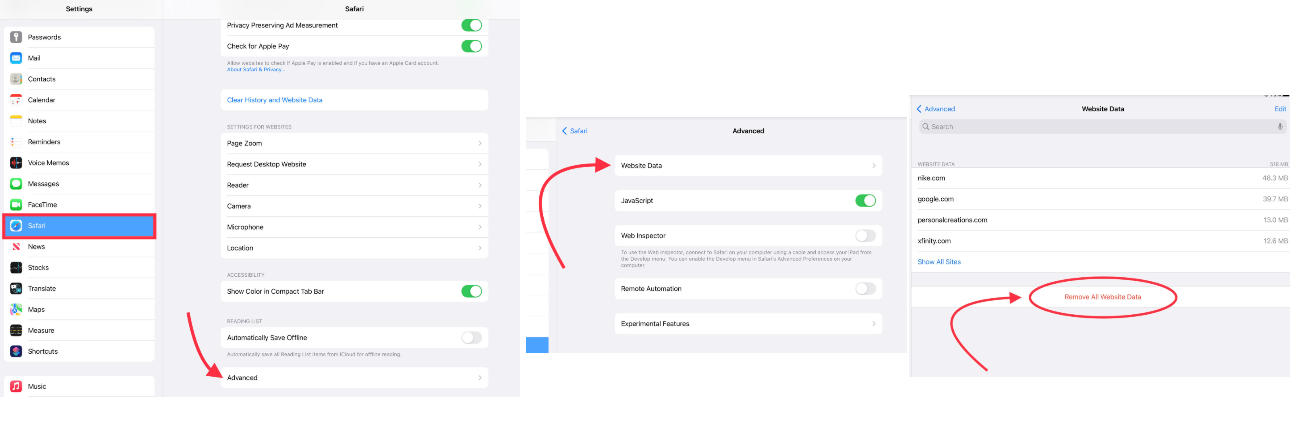
On a student iPad you may find the 'Clear History and Website Data' is grayed out as students may not have the ability to clear their history. However, they do have the ability to clear all Safari data (remove cookies, cache, and saved data) by following the steps below.
- Open the Settings on the iPad
- On the left, scroll down to Safari.
- Scroll to the bottom of the right side and tap on Advanced.
- Tap Website Data
- Tap Remove All Website Data
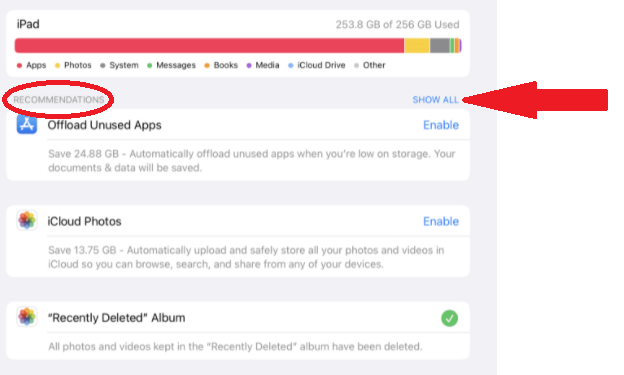
Or let Apple choose
If you’re not sure or you don’t have the time to look at each individual app, you can check the iOS recommendations. From Settings > General > iPad Storage, tap on the items underneath the Recommendations header to get customized options for your iPad.
Comments
0 comments
Please sign in to leave a comment.